

NEWS
All categories
Installation instructions for pump accessories of smart digital proofer for pad printing samples
Time:
2020-09-17 14:46
Installation Instructions for Pump Accessories of Smart Digital Proofer
1. Remove the pump accessories from the proofing machine, and first push the carriage to the middle. We can see the pump attachment. As shown in Figure 1, we can manually push the pump attachment down and then push it to the left to separate it from the junction on the right, then pull out the tube and take out the spring. Then the pump accessories are removed.
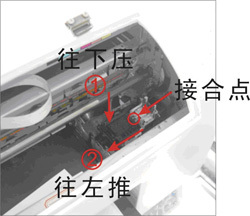 figure 1
2. To reinstall the pump accessories, follow the following methods. Find the pump accessories, as shown in Figure 2
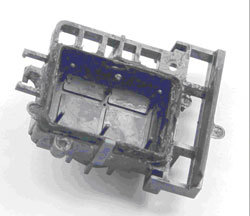 figure 2
3. Then find the rubber ring for the pump accessory, as shown in Figure 3
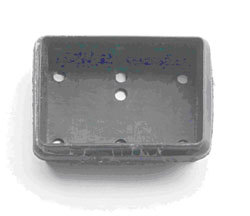 image 3
4. Put the rubber ring into the pump attachment. Figure 4
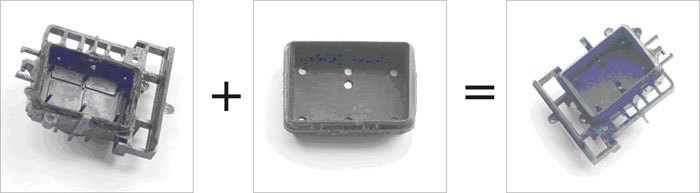 Figure 4
5. Use a small amount of 502 glue to glue the four sides of the rubber ring and the pump attachment. Figure 5
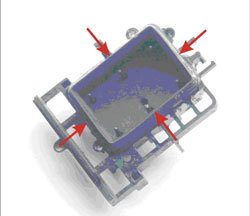 Figure 5
6. Install the sponge. Figure 6
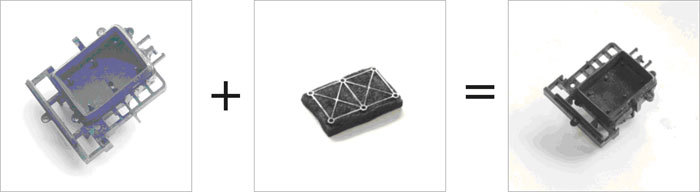 Figure 6
7. Connect the tube and the spring, press down the pump accessories, and then push it to the right, and connect it to the right junction, and the installation is complete. Figure 7
 Figure 7
Next
Next
NEWS

2021.09.15

2021.09.15

Add:
No. 22, Yanshou Road, Yantou, Nanhai District, Foshan City, Guangdong Province, China Yucheng Machinery Factory, Bangtian Building
Email:
CONTACT US


